Setting Up Unity ML-Agents: A Step-by-Step Guide
Objective: Install and configure the necessary environment to begin training intelligent agents.
Installing the full stack required to work with Unity and Machine Learning Agents (ML-Agents) can feel a bit daunting. It requires orchestrating specific versions of several tools to ensure they talk to each other correctly. While the official ML-Agents documentation is the ultimate source of truth, this guide serves as a practical, streamlined walkthrough to get you up and running quickly.
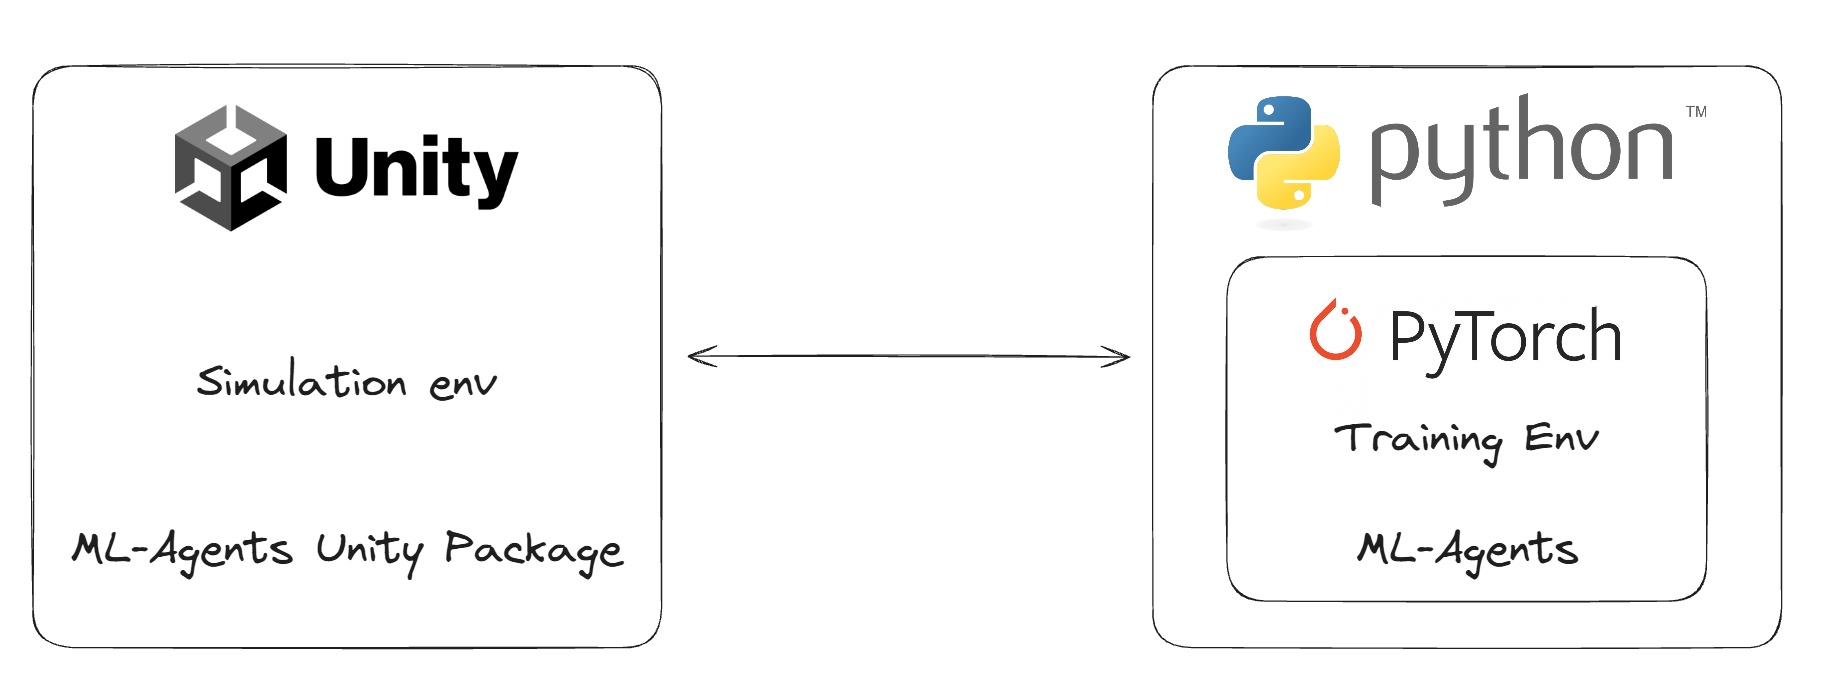
To work with ML-Agents, we need to set up two distinct components:
- The Python Toolkit: Handles the training logic and neural networks.
- The Unity Package: Handles the simulation and the agents inside the game engine.
Let’s start with the Python side, as that is usually the trickiest part.
Part 1: The Python Toolkit
To keep our work clean and organized, we will use a virtual environment. This prevents us from “polluting” our global Python installation and makes managing dependencies much easier.
Disclaimer: This tutorial was created on a Windows machine. However, the software and general commands listed here are compatible with macOS and Linux as well.
1. Installing a Conda Manager
We need a tool to manage our virtual environments. I recommend Miniconda (a lightweight version of Anaconda).
- Download Miniconda here.
- Follow the installation instructions for your operating system.
2. Creating the Environment
Once installed, open your terminal (or the “Anaconda Prompt” on Windows). We will create a new environment named mlagents running a specific version of Python (3.10.12) known to be stable with the current toolset.
Run the following command:
conda create -n mlagents python=3.10.12

3. Activating the Environment
Now that the environment exists, we must “enter” it. You will need to run this command every time you open a new terminal to work on your project:
conda activate mlagents
4. Installing PyTorch
ML-Agents uses PyTorch as the underlying library to train models. We need to install version 2.2.1.
Option A: For NVIDIA GPU Users (Recommended) If you have a dedicated NVIDIA graphics card, you should install the version that supports CUDA. This allows training to happen on your GPU, which is significantly faster.
pip3 install torch~=2.2.1 --index-url https://download.pytorch.org/whl/cu121
Option B: For CPU Users If you do not have a dedicated NVIDIA GPU, or are on a Mac without discrete graphics, use the CPU version. It works perfectly fine, though training will take longer.
pip install torch~=2.2.1 --index-url https://download.pytorch.org/whl/cpu
5. Installing the ML-Agents Package
Finally, to complete the Python configuration, we install the actual ML-Agents Python interface.
python -m pip install mlagents==1.1.0
Verification
To ensure everything was installed correctly, run the help command. If you see the ML-Agents logo and a list of commands, you are good to go!
mlagents-learn --help
Part 2: The Unity Installation
The Unity side is much simpler.
- Open Unity 6 (Version 6000.0 or later).
- Go to
Window->Package Manager. - Click the
+or search bar and look forcom.unity.ml-agentsby name. - Click Install.

Conclusion
If you followed these steps without errors, congratulations! You have successfully bridged the gap between Python and Unity. You now have a fully configured environment ready to train intelligent agents.
In the next post, we will look at how to verify this setup by training our first agent using Unity’s example projects.