Hands On with Unity ML-Agents: Training Your First Example (3DBall)
Hands On with Unity ML-Agents: Training Your First Example (3DBall)
Now that we have successfully configured our environment following the steps in the Installation Guide, it is time to get practical. The quickest way to test that everything is working correctly is by utilizing the example projects provided by the Unity ML-Agents team.
In this post, we will set up the examples project and train one of the most basic example environments: 3DBall.
Step 1: Setting Up the Examples Project
To access the examples, you first need to clone the official ml-agents GitHub repository. Once cloned to your machine, open Unity Hub and add the folder located at /Project as a new project.
Note: While the repo contains wealth of interesting information and guides, the actual Unity project we need for this tutorial is within that /Project subdirectory.
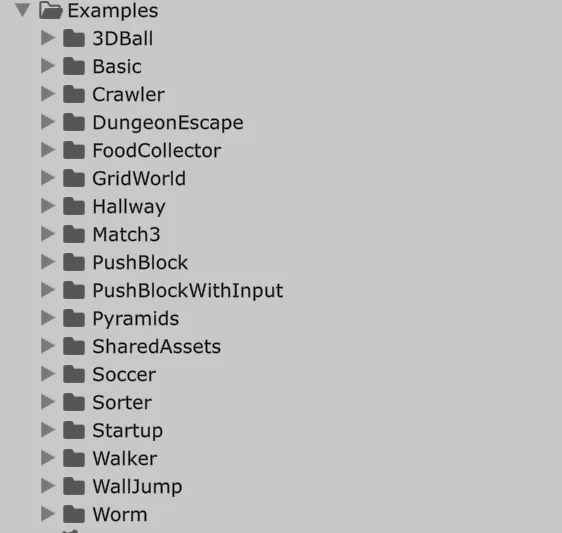
While this project includes numerous examples to study and practice with, today we are focusing on 3DBall to verify our installation.
First, navigate to and open the scene located at: ML-Agents/Examples/3DBall/Scenes/3DBall.
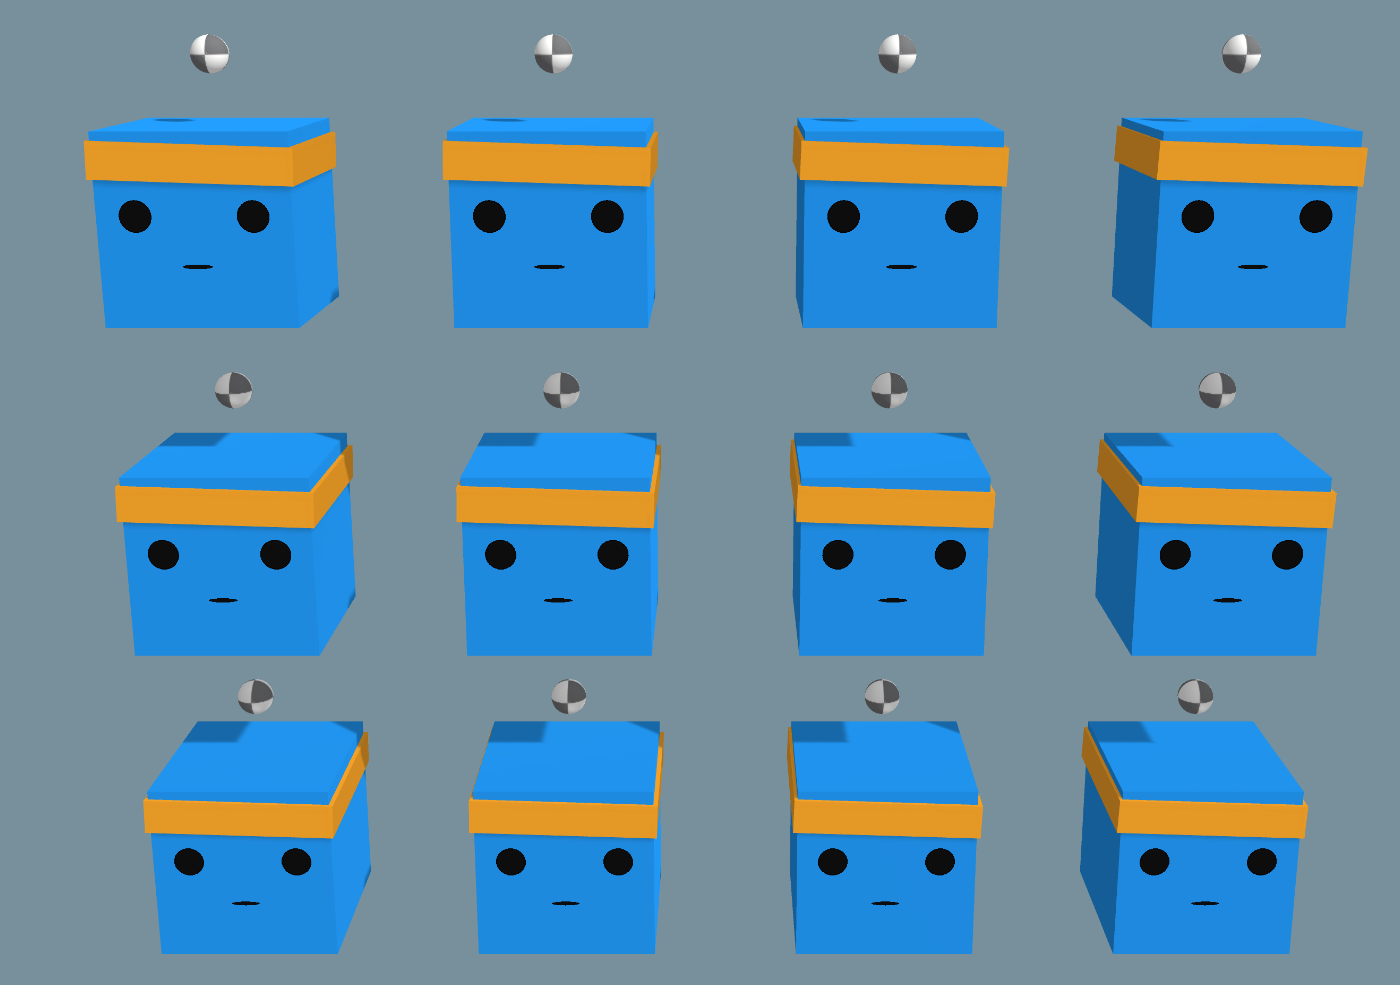
Upon opening the scene, you will see a series of identical platforms. These are our Agents (a crucial term we will dive deeper into in future posts). Each agent has a small ball on its head.

The objective of this training environment is simple: the Agent must rotate the platform to keep the ball balanced on top without letting it fall. You will notice multiple Agents in the scene; this is a common technique to accelerate the training process by running simultaneous sessions looking to achieve the same goal.
A great feature of the examples project is that it includes pre-trained models. If you press Play in the Unity Editor right now, you will see that the agents already know exactly how to balance the balls perfectly.
Step 2: Training Our Own Model
Watching the pre-trained model is great, but the real goal is to train our own model from scratch.
To begin, open Anaconda Prompt (or your terminal) and activate your mlagents environment, just as we did during the Installation Guide.
Once the environment is loaded, navigate to the root directory where you cloned the GitHub repository. To start a training session, we will use one of the configuration files included in the project. These files allow us to tune parameters like training duration (we will explore these in depth in a future post).
Run the following command in your terminal:
mlagents-learn config/ppo/3DBall.yaml --run-id=firstRunIf the command initializes correctly, the terminal should display a message similar to this:
[INFO] Listening on port 5004. Start training by pressing the Play button in the Unity Editor.The Python trainer is now waiting for the simulation data. Return to Unity and press the Play button to begin the training session.
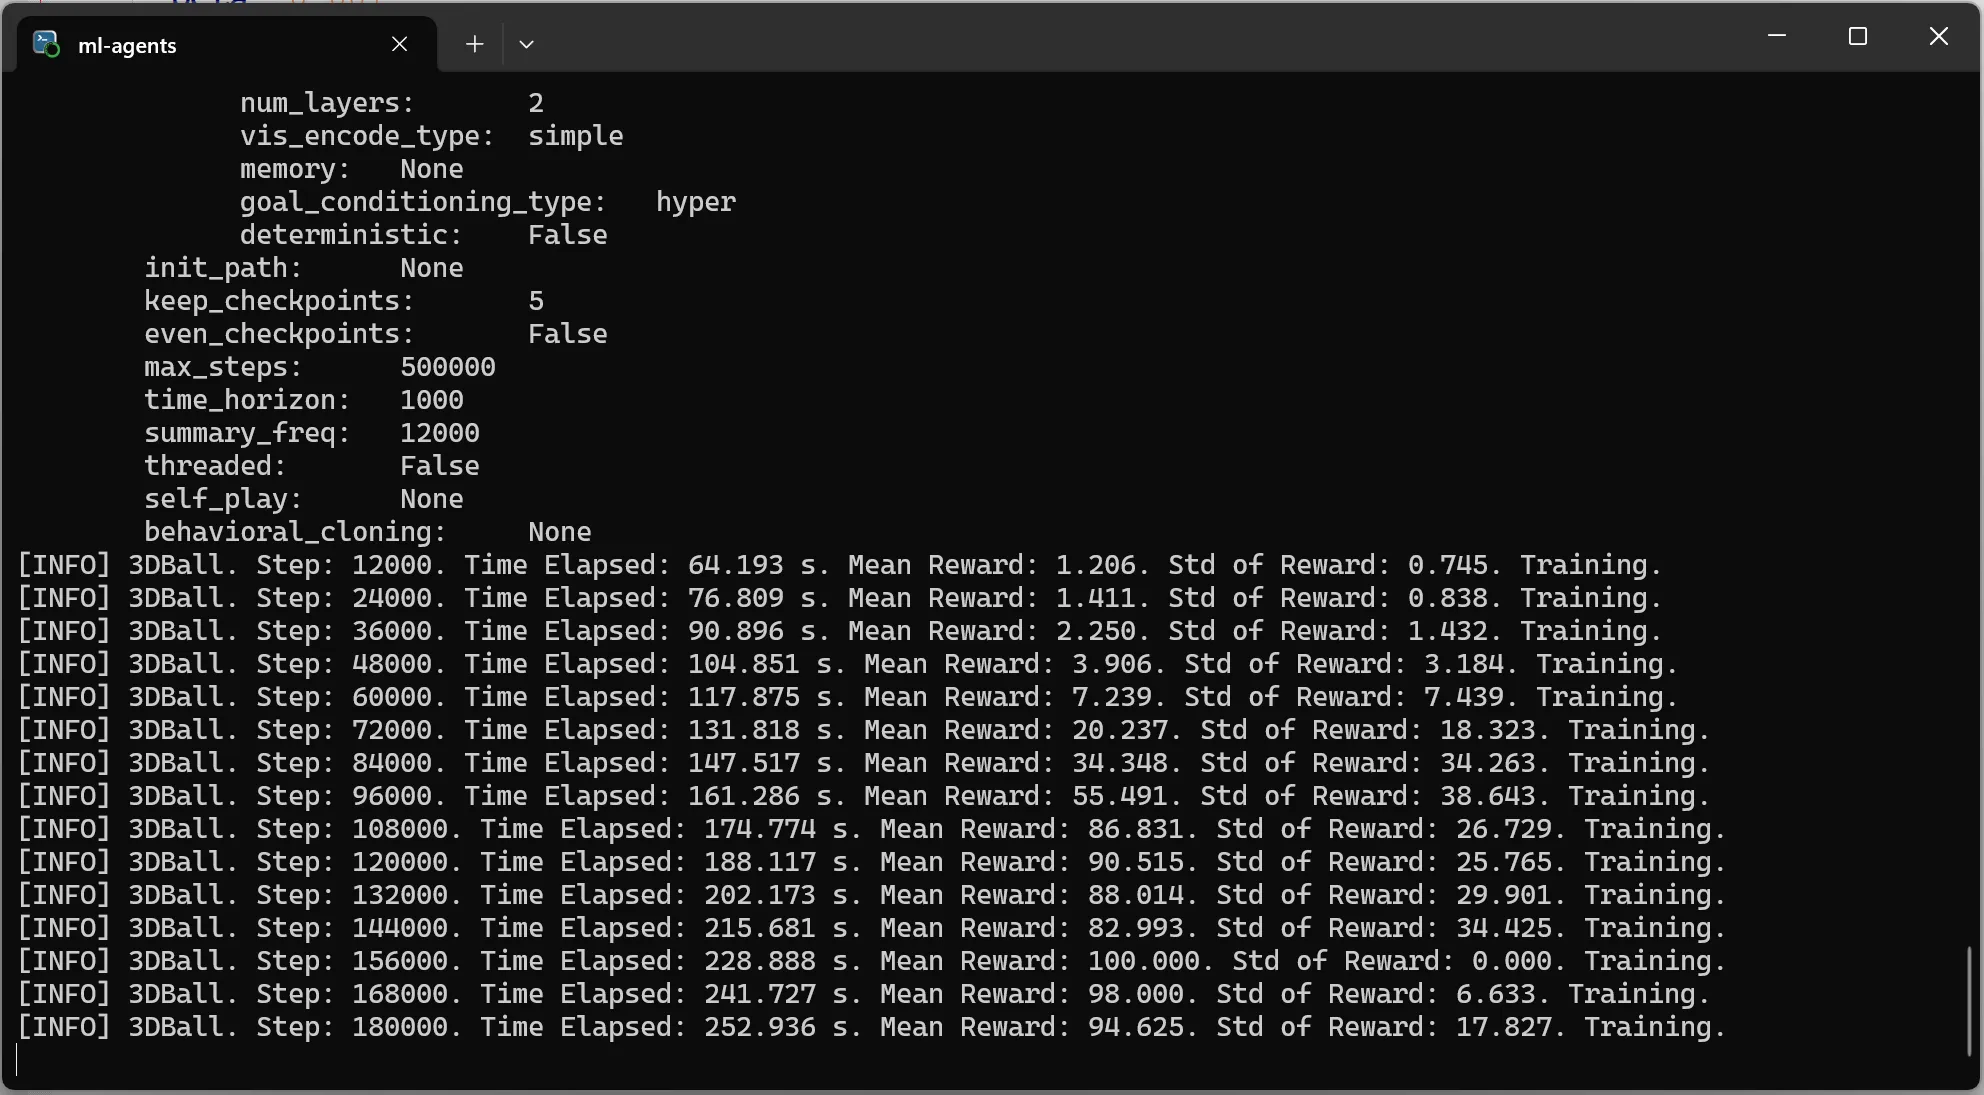
As training progresses, keep an eye on your terminal. Seeing the MeanReward value increase is the best indicator that your agents are learning. In this specific example, the reward eventually converges around a value of 100. This means the agent has successfully learned to prevent the ball from ever falling off its head.
Step 3: Verifying the New Model
Once the training session completes (or if you interrupt it early), the trainer will generate a new file containing your newly trained model brain.
The terminal output will show you where the file was saved:
[INFO] Copied results\firstRun\3DBall\3DBall-500813.onnx to results\firstRun\3DBall.onnx.Now that you have your own .onnx model file, you can use it in Unity instead of the pre-trained one. To do this:
Drag the new 3DBall.onnx file from your file explorer into Unity’s Project window.
Select the Agent objects in the scene hierarchy.
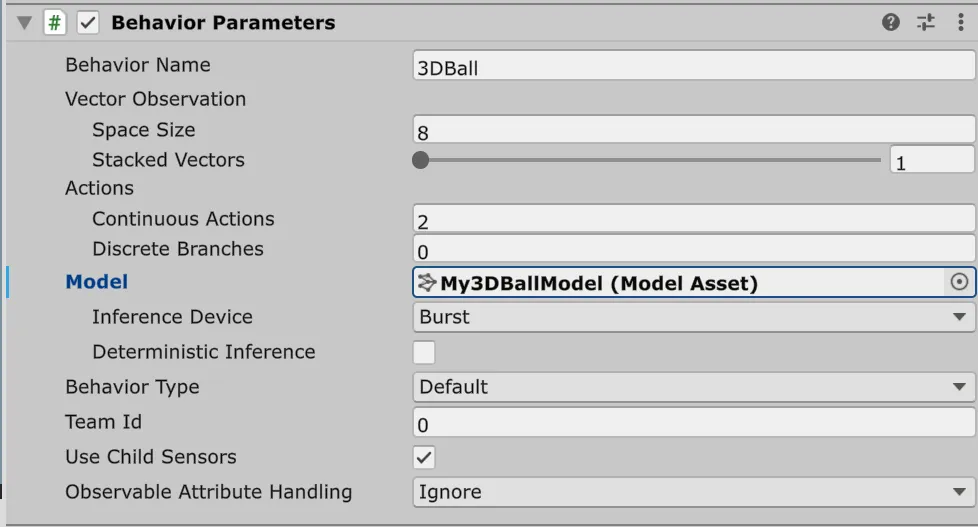
In the Inspector, locate the Behavior Parameters component.
Drag your new model file into the Model field, replacing the previous one.
Now press Play again. Your agents are now being controlled by the brain you trained!
Conclusion
By successfully completing this tutorial, you have confirmed that your environment is correctly installed and configured to train new models.
In future posts, we will analyze some of the other examples in the project in greater depth and begin creating our own custom training environments. Stay tuned!