How to Set Up a Remote Server for Unity ML-Agents Training
In my previous post, we covered how to set up a local machine to train agents using ML-Agents. However, running everything locally isn’t the only—or always the best—way to handle training.
In my specific case, my main work computer doesn’t have an NVIDIA graphics card. This means I can’t take advantage of CUDA acceleration, which significantly speeds up training. However, I do have an older machine equipped with a NVIDIA GeForce GTX 1060 6GB that does support CUDA.
I decided to repurpose this hardware to build a dedicated agent training lab. Here is how I did it.
Prerequisites
First, you need to configure the environment on your remote machine by following the steps in my previous installation guide.
Once the environment is ready, we can start training. However, since the ML-Agents environment usually expects to communicate with a local Unity Editor, we have two distinct methods to bridge the gap.
Method 1: SSH Tunneling
This is the most direct option. It effectively tricks Unity into thinking the training process is running locally by tunneling the connection to the remote server.
To do this, start the mlagents-learn process on your remote server. Then, on the local machine where the Unity Editor is running, open a terminal and execute the following command:
ssh -L 5004:localhost:5004 root@192.168.1.15(Replace the IP address with your server’s actual IP)
Once the tunnel is established and the remote trainer is listening, press Play in the Unity Editor on your local machine.
The Downside: While simple to set up, this method has a significant drawback: Network Latency. The constant data exchange between your local Unity Editor and the remote server can introduce lag, which often negates the performance gains you would get from using the remote GPU.
Because of this, I recommend the second method.
Method 2: Running a Headless Build (Recommended)
This method involves a few extra steps, but it isolates the process entirely on the server, removing network latency from the equation. We will build the game for Linux, upload it, and run it “headless” (without a graphical interface).
Step 1: Build for Linux
In Unity, we need to create a standalone executable for the server’s OS (usually Linux).
- Go to File -> Build Profiles.
- Select Linux (If the module isn’t installed, add it via Unity Hub).
- Click Build.
Step 2: Upload to Server
Once built, zip the files. You can upload them to your server using SCP or your preferred file transfer tool.
scp MyLinuxBuild.zip username@your_server_ip:/home/username/Step 3: Unzip and Permissions
On the server, unzip the build and ensure the executable has permission to run.
unzip MyLinuxBuild.zip -d MyGameDir
chmod +x MyGame.x86_64
Step 4: Run the Training
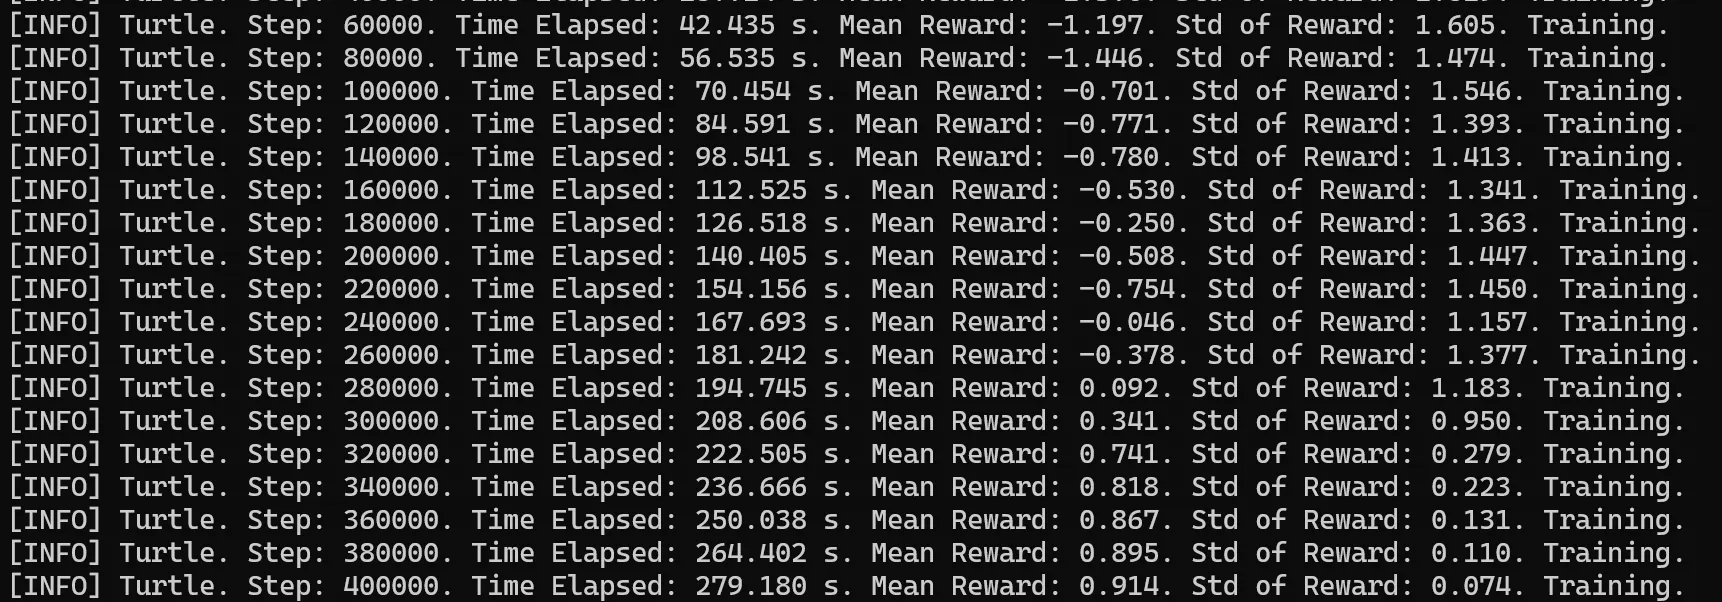
Now we can start the training. We need to point ML-Agents to our built executable and use the --no-graphics flag so it doesn’t try to render visuals on a server that likely lacks a display.
mlagents-learn trainer_config.yaml --env=./MyAgentEnv/MyGame --run-id=ServerRun_01 --no-graphicsTip: I highly recommend using a terminal multiplexer like tmux or screen. If you are running a long training session and your SSH connection drops, your training process will die. Using
tmuxallows the session to persist in the background even if you disconnect.
Results and Conclusion
The main advantage of Method 2 is that it leverages the remote GPU’s raw performance without network bottlenecks.
Once training is complete, you can check the results and view them using TensorBoard:
tensorboard --logdir results --bind_allTip: Use —bind_all to allow external connections to TensorBoard
Is it worth it?
In my specific test case, the gains were modest.
Local (CPU): ~33 minutes for 2.000.000 steps.
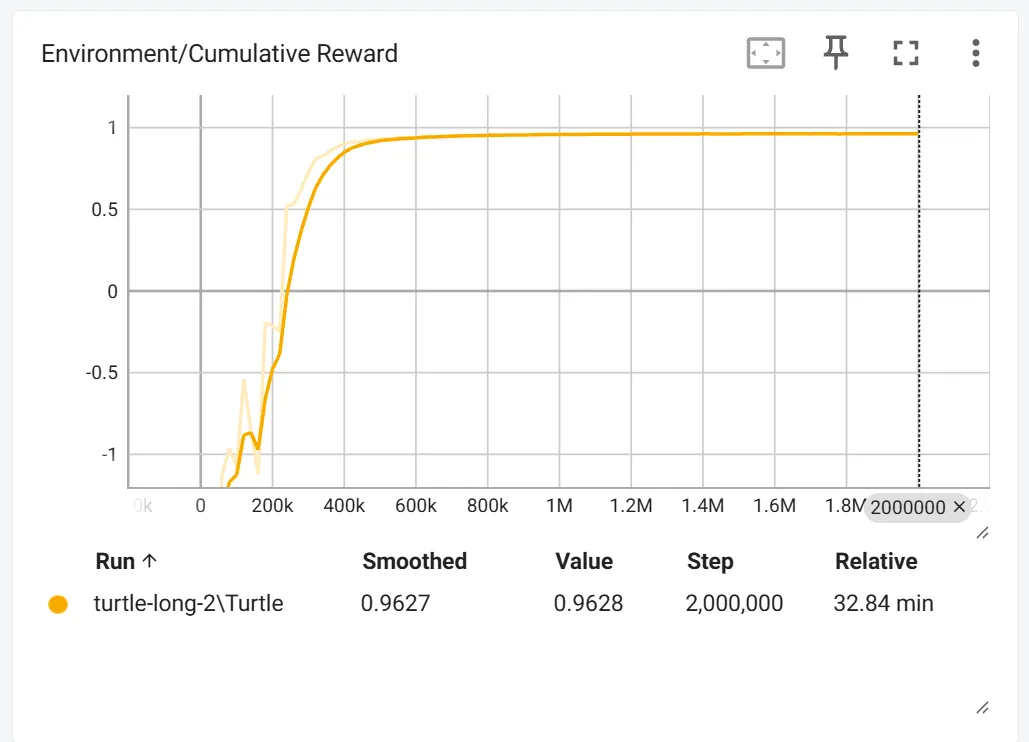
Remote (Old GPU): ~27 minutes for 2.000.000 steps.
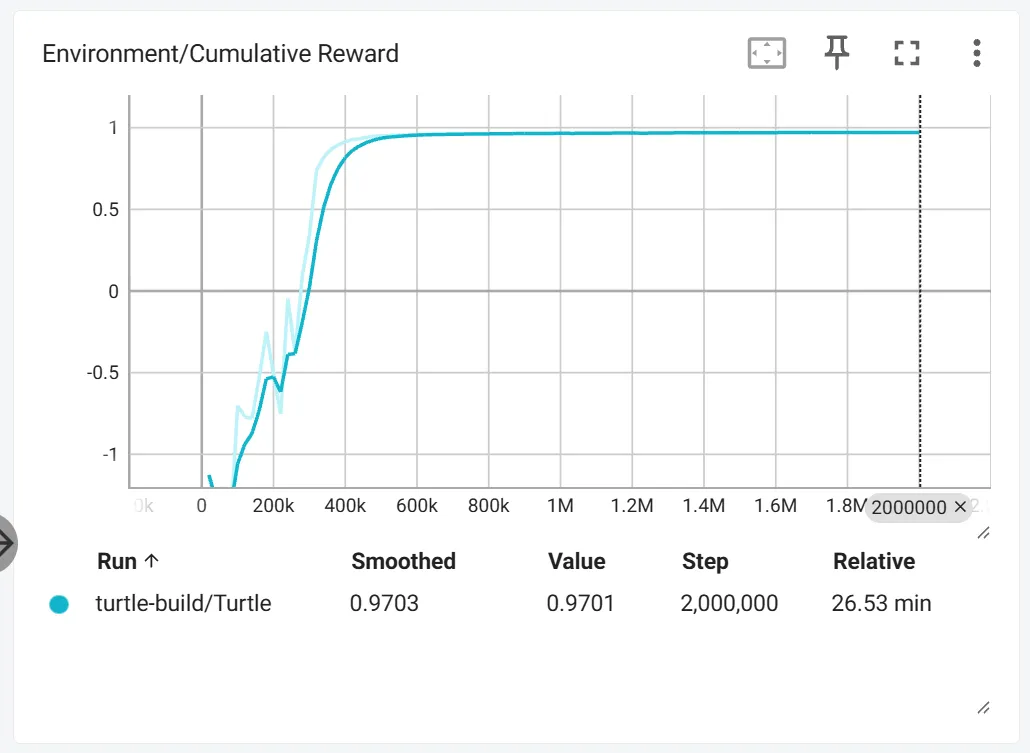
While a 6-minute saving might not seem worth the extra “overhead” of building and uploading, keep in mind that I am using very old hardware. The real value here is the workflow. This exact method applies if you rent a high-performance cloud server for a few hours. In that scenario, the time difference would be noticeable.
I plan to test this workflow on more powerful hardware soon to see the true potential of remote training.